This post explores Azure's OpenAI service, in combination with Azure's other offerings, to create a Microsoft Teams Chatbot for users to interact with their organisation's documents.
Contents
Overview
The overview of the services used, and their interactions, are as follows.

Users interact with the ChatBot using the MS Teams app.
MS Power Virtual Agent (PVA) handles the generic conversation flow including greetings and conversation endings. The 'fallback' topic (discussed later) handles the core interaction with MS Power Automate.
MS Power Automate (PA) is where most set-up work is required, connecting user requests to Azure Cognitive Search (to interact with your oragnisation's documents), and to Azure OpenAI, to incorporate OpenAI's ChatGPT.
Azure OpenAI conversational model interacts with the user. If the user requires insight from the content, then the model retrieves data from the Azure Cognitive Search index before creating a response. The response is determined primarily by the prompt, secondly by parameter tuning, and thirdly by a context-setting message that can be provided.
Behind the scenes:
Azure Cognitive Search is used to index ('analyse') the content that is connected as a data source (e.g. from SharePoint or a storage account) as configured.
In our example, content is stored in the Azure DataLake Storage Gen2.
PART 1 - Configure Azure OpenAI
The easiest part of this process is creating an Azure OpenAI deployment. We will create it now, test parameters and settings, and then gather information that will allow us to speak to the deployment through Power Automate.
Go to oai.azure.com
Follow the process to request use of Azure’s OAI, if required.
Create a Deployment and fill in the basic settings.
Note on changing settings in playground:
It is not clear that there is a definite flow-on effect to the Power Virtual Agent (and thus to MS Teams) when modifying settings in the playground. At time of writing, the Azure OpenAI playground is in 'preview' mode. The connection to data sources, parameters, and context-setter may be wiped between between browser sessions.
Use the playground to test system messages, parameters and examples of data sources.
Once happy with the tested settings, they can be stated in the HTTP request within Power Automate, so that the same settings flow through to the Power Virtual Agent.
4. Under Playground > Chat, System template and System message can be set. This gives context to every response generated by the chatbot. Play around with system context setters until you are happy with the change in responses (if noticeable). These effects are subtle and do not provide guaranteed effects, but may help shape responses to a desired effect.
Try the following system message for purposes of information extraction. The hashes (###) act as breaks between points of information used to set the context, which can help the model process the request.
Pro tip: using hash breaks can help also help ChatGPT process complex prompts.
You are an AI assistant that helps people find information and interact with the data stored within the data source.
###
Answer as concisely as possible.
###
You should not add information from outside of the documents you are linked to.
###
If you cannot answer a question with only the information from the linked data, reply with (without quotes): "I do not have access to that information. Please try a different question or check your linked documents."
###
5. Save changes and then scroll down to tweak some of the configuration settings, shown below.

Max response sets the max number of tokens a response from the chatbot can contain. 800 is likely more than enough.
Temperature: As we are going to use the chatbot in a deterministic way (retrieve information from PDFs/txt/word files), we should set temperature to zero. This reduces the randomness of the generative AI model.
Top P has a similar purpose and lower also means less random, but it is advised to adjust one and not both.
Stop sequence is used to select words that will trigger the chatbot to stop generating a response and send the response to the user up until the stop-words (which won’t be included in the response).
Increasing Frequency penalty means the response is less likely to be similar in nature. This may be detrimental for purposes of information extraction, thus can be left at 0.
Increasing presence penalty introduces a penalty on similar tokens being generated, causing new topics to be introduced. This can be left at 0.
Notice the last item ‘Current token count’: input tokens has increased because we set up the system context setting text (prior step).
6. Scroll back up to the Chat Session then Clear chat > View code > select json from the dropdown, and copy the text into a notepad for future use. This JSON string will be used in a HTTP request, within Power Automate, to call ChatGPT with the settings that you have been testing in the playground.

7. Also scroll down and copy the endpoint URL and Key to a text file for use in Part 3.

PART 2: Set up Microsoft Power Virtual Agent (PVA) and the basic MS Teams chatbot
1. Go to web.powerva.microsoft.com and sign up for Power Virtual Agent, if required.
2. Go back to oai.azure.com and make sure you are in the deployment of your chatbot that you made previously (check this in the top right corner).
Select: Deploy to > A new power virtual agent bot.

Sometimes this option may not appear unless the step 1 is done, which sets up the Power Virtual Agent.
3. Continue in Power Virtual Agents, fill in your desired bot name and click create.

Now the new chatbot should appear in the Chatbots section.

Note: developers may need to share with one another for others to see a bot they created.
4. Click into your bot and go into Settings > Channels and Click Microsoft Teams, which will open a pop-up so that you can enable it.

. . .

5. Optionally, edit the details to enable users to add this bot to a team, among other options:

6. Under Settings > Security > Authentication, select “Only for Teams” which will require users to sign-in to use the bot.

7. Outside of Settings, go into ‘Publish’ to publish the bot to Teams.

Now you should see:

8. Outside of PVA, make sure you have your MS Teams app open.
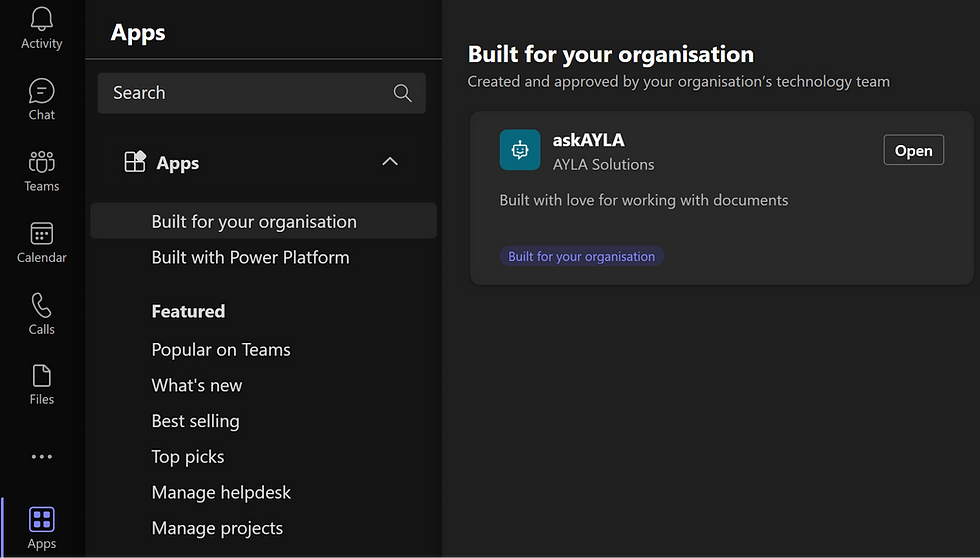
Back in PVA, go back into Settings > Channels > Microsoft Teams and click ‘Open Bot’. This should take you into your MS Teams, and there should be a pop-up to install the App (the chatbot). If there is no pop-up, try and search for the name of your bot in the Apps section in your MS Teams, under 'Built for your organisation':
10. Add your chatbot App:

11. You should then be taken to your Chatbot and be able to interact with it.

Notice your chatbot will also appear in the search bar at the top.
Concluding Parts 1 & 2
Now we have created the Azure OpenAI deployment and the Power Virtual Agent. You can now play with OpenAI's settings in the Chat Playground and see how they affect responses. Separately, you can also interact with your PVA (chatbot), and see how it responds to generic messages (currently, without ChatGPT's engine).
Next steps
Comments